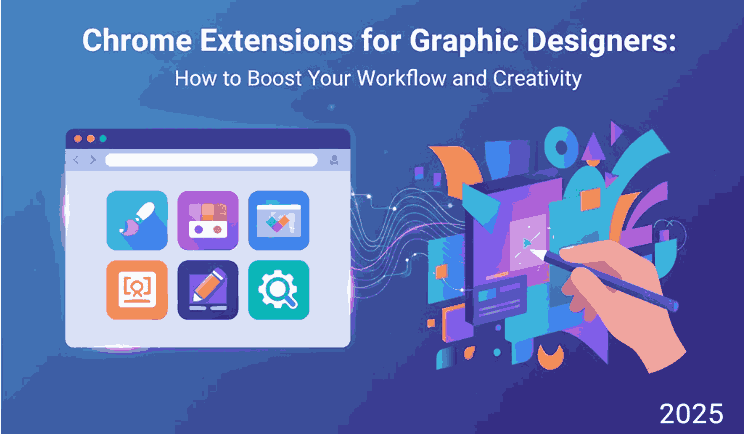
Posted on

Chrome Extensions for Graphic Designers: How to Boost Your Workflow and Creativity 2025

Chrome Extensions Graphic Designers

Table of Contents

  1. Introduction
  2. Why Chrome Extensions Are Essential for Designers
  3. Top Chrome Extensions Every Graphic Designer Should Use
    • 3.1 ColorZilla – Simplify Color Management
    • 3.2 WhatFont – Identify Fonts Instantly
    • 3.3 Awesome Screenshot – Capture and Annotate Ideas
    • 3.4 Loom – Communicate Visually
    • 3.5 Window Resizer – Perfect Responsive Previews
  4. Enhancing Your Design Workflow with Chrome Tools
  5. Choosing the Right Fonts for Your Design Projects
  6. Font Recommendations from CalligraphyFonts.net
  7. Conclusion
  8. References

1. Introduction

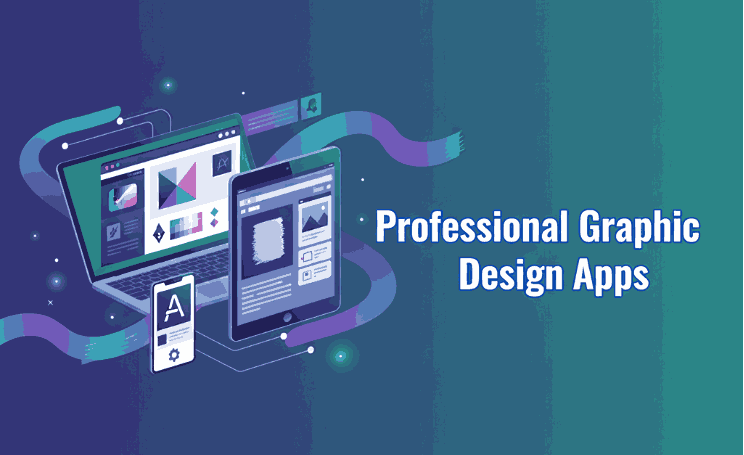
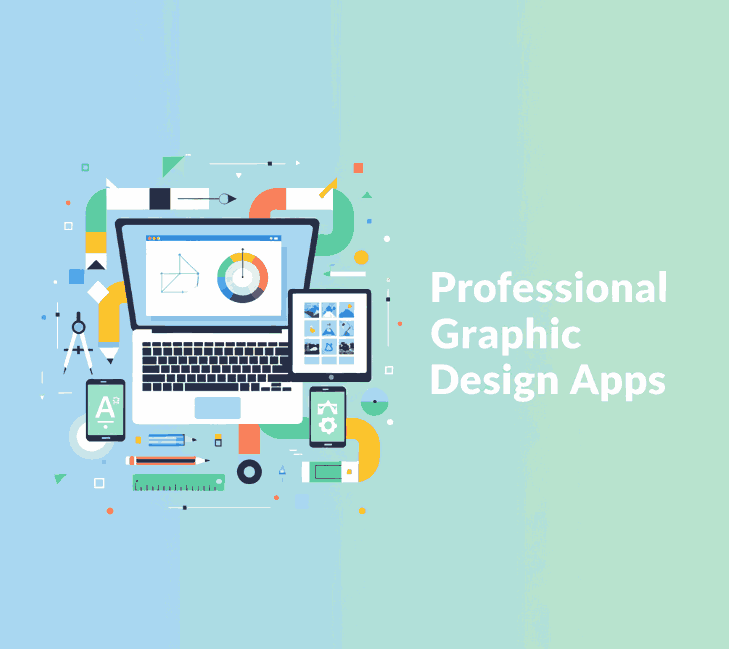
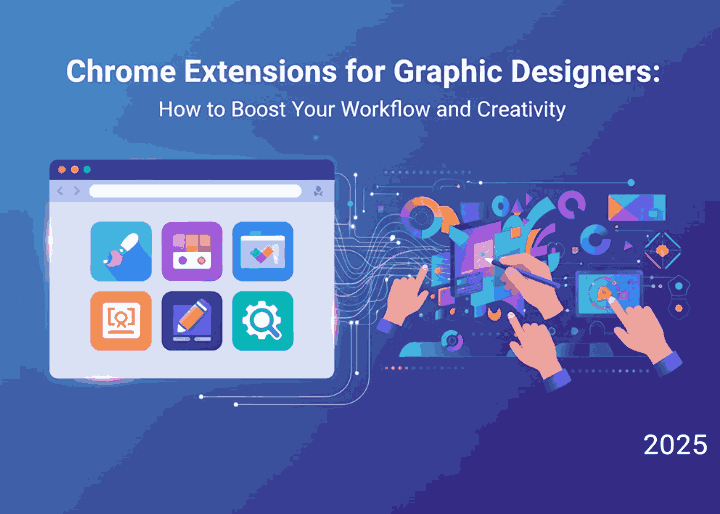
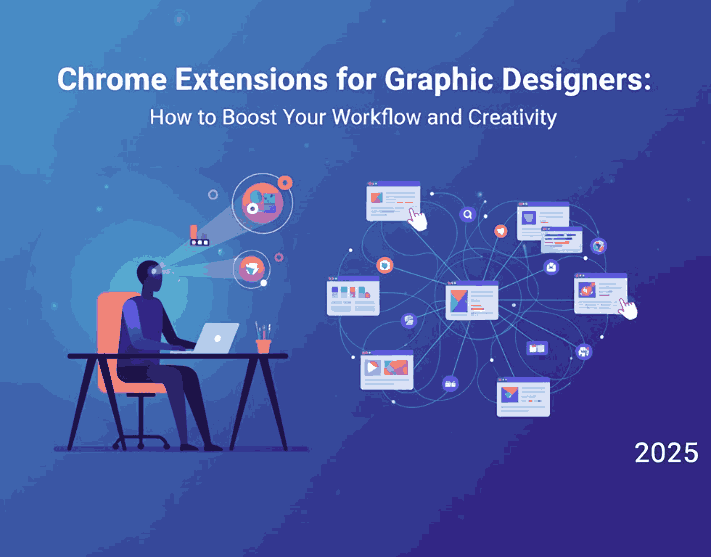
Chrome Extensions Graphic Designers In the fast-paced world of design, every second counts. From managing creative tasks to fine-tuning typography, designers rely on tools that streamline their workflow and spark inspiration. That’s where Chrome extensions for graphic designers come in handy.

Whether you’re working on branding, UI/UX, web layouts, or social media designs, these extensions can save you time, enhance productivity, and elevate your creative process.

2. Why Essential Chrome Extensions Graphic Designers

Chrome Extensions Graphic Designers

Google Chrome is more than just a web browser—it’s a full-fledged creative hub. With the right extensions, designers can:

  • Instantly pick colors from any website.
  • Identify and analyze fonts.
  • Capture screenshots for inspiration boards.
  • Test designs across different screen sizes.
  • Manage creative assets effectively.

Using the right Chrome extensions for graphic designers helps bridge the gap between creativity and efficiency, letting you focus on what matters most: design.

3. Top Every Chrome Extensions Graphic Designers Should Use

3.1 ColorZilla – Simplify Color Management

ColorZilla is one of the most popular color tools for designers. With it, you can pick colors from any webpage, create gradients, and save palettes for future projects. It’s perfect for web and brand designers who deal with color harmony daily.

3.2 WhatFont – Identify Fonts Instantly

Typography defines design aesthetics. With WhatFont, you can hover over any text online to instantly reveal its font name, size, and family. This extension is a must-have for font lovers and typographers who want to explore typefaces effortlessly.

3.3 Awesome Screenshot – Capture and Annotate Ideas

Awesome Screenshot lets designers take quick captures, record screens, and annotate visuals. It’s an excellent tool for client presentations, mockups, and portfolio documentation.

3.4 Loom – Communicate Visually

Loom helps designers record quick video messages and share visual feedback. Instead of lengthy emails, you can explain design concepts or revisions through screen recordings—saving hours in communication.

3.5 Window Resizer – Perfect Responsive Previews

Testing responsive design has never been easier with Window Resizer. It allows you to preview how your designs look on various screen dimensions—mobile, tablet, or desktop—ensuring your designs are pixel-perfect.

4. Enhancing Your Design Workflow with Chrome Tools

Chrome extensions do more than just simplify tasks; they enhance your creative flow. By automating repetitive processes like font detection or color picking, designers can focus on conceptual creativity.

For instance, extensions like ColorZilla and WhatFont let you seamlessly transition from inspiration to execution. Meanwhile, productivity tools like Loom and Awesome Screenshot streamline client collaboration and visual communication.

Using these extensions collectively helps you maintain speed, accuracy, and design quality.

Chrome Extensions Graphic Designers

5. Choosing the Right Fonts for Your Design Projects

While extensions help optimize the workflow, typography remains at the core of design excellence. Fonts can define brand voice, influence perception, and elevate design appeal.

When working on UI/UX or web-based projects, choose fonts that reflect your brand’s character—be it elegant, modern, playful, or minimalist. CalligraphyFonts.net offers a diverse range of fonts that blend perfectly with professional designs.

6. Font Recommendations from CalligraphyFonts.net

To complement your digital projects, here are some stunning font options that can enhance your creative visuals:

  • Midline Font – A versatile signature-style font ideal for branding and design presentations.
  • Rutinitas Font – A refined calligraphy font that adds elegance to digital mockups.
  • Signatory Font – Perfect for logo concepts and UI headings with a stylish handcrafted look.
  • Rellative Font – Modern and sleek, ideal for showcasing design tool UIs and marketing visuals.

These fonts are not only visually captivating but also easy to pair with minimalist or complex designs, making them perfect companions for your Chrome-based creative workflow.

7. Conclusion Chrome Extensions Graphic Designers

Chrome Extensions Graphic Designers are indispensable tools for modern creatives. They streamline tedious tasks, enhance productivity, and bring more efficiency into your workflow.

By integrating tools like ColorZilla, WhatFont, and Loom—and pairing them with professional-quality fonts from CalligraphyFonts.net—you can elevate every design project to a new level of professionalism and creativity.

Explore, experiment, and embrace these tools to make your design process smarter and more enjoyable.

8. References

  1. Envato Tuts+ – Productivity Tools for Designers
  2. Google Chrome Web Store – Design Extensions
  3. Adobe Creative Cloud – Start your Creative Cloud free trial
  4. DinStudio – Useful Google Chrome Extensions for Designers
Posted on

Best Color Palette Generator: New Tools & Tips for Designers

Best Color Palette Generator

Table of Contents

  1. Introduction: Why a Good Color Generator Matters
  2. What Makes a Color Palette Generator “Best”?
  3. Top Best Color Palette Generator Tools in 2025
    • 3.1 Coolors
    • 3.2 Adobe Color
    • 3.3 Paletton
    • 3.4 Colormind
    • 3.5 Khroma
    • 3.6 ColorSpace / MyColor.Space
    • 3.7 ColorMagic / AI generators
  4. How to Choose the Right Generator for Your Workflow
  5. Applying Generated Palettes to Fonts & Branding
  6. Font Mockup Examples from Your Collection
  7. Tips & Best Practices When Working with Generated Palettes
  8. Common Pitfalls to Avoid
  9. Conclusion & Action Steps
  10. References

1. Introduction: Why a Good Color Generator Matters

Choosing a Best Color Palette Generator can be one of the most challenging and yet foundational steps in any design project. A strong color palette sets tone, mood, and visual harmony. For font designers and sellers, the palette behind your mockups and branding visuals matters: it influences perception and lets your typefaces shine.

This is where a best color palette generator becomes invaluable. It helps you experiment with harmony, contrast, and visual coherence quickly and reliably. In this article, we’ll explore top tools, how to pick one that suits your workflow, and how to apply those palettes to font mockups and branding.

Best Color Palette Generator

2. What Makes a Best Color Palette Generator?

Not all color tools are created equal. Here are criteria to judge whether a generator is worth your time:

  • Ease of use / UI / UX — simple interface, clear controls
  • Color harmony modes — support for analogous, complementary, triadic, tetradic, etc.
  • Image upload or extraction — ability to extract palettes from photos or inspirations
  • AI / smart suggestions — help with palette variation, learning your preferences
  • Export / integration formats — HEX, RGB, CSS, ASE, plugins for design tools
  • Preview / context — show palettes in mockups or UI / layout previews
  • Performance & reliability — fast, responsive, no heavy lag

A generator that ticks many of these boxes becomes a go-to tool in your design arsenal.

3. Top Best Color Palette Generator Tools in 2025

Here are some of the leading, widely recognized tools used by designers today:

3.1 Coolors

Coolors is praised for speed, simplicity, and versatility. You can lock certain colors and shuffle others, browse trending palettes, and export in many formats.

3.2 Adobe Color

Adobe Color offers multiple harmony rules (analogous, monochrome, triad, etc.) and integrates with Adobe Creative Cloud. You can also upload images and extract color themes.

3.3 Paletton

Paletton is ideal for more experimental palette exploration. It shows previews, scheme variations, and interactive wheel adjustments.

3.4 Colormind

Colormind uses deep learning to suggest palettes based on existing design styles, photos, and popular palettes.

3.5 Khroma

Khroma applies AI to learn your preferred colors and continuously generate palettes aligned with your taste.

3.6 ColorSpace / MyColor.Space

These tools offer palette generation and gradient exploration based on user input or random generation.

3.7 ColorMagic / AI Generators

ColorMagic allows generating palettes from text, images, brand names—with AI backing.

Each of these tools has strengths—some are faster and simpler, others more advanced or AI-powered. You may use multiple depending on your project type.

4. How to Choose the Right Best Color Palette Generator for Your Workflow

Here are guiding questions to help you select the best generator for you:

  • Do you prefer creativity or control? (Some tools give you full control, others guide you.)
  • Do you need to extract palettes from images / brand assets?
  • Do you often work inside Adobe / Figma / design tools and need plugin integration?
  • Do you want AI assistance or more manual adjustment?
  • Which export formats do you need (CSS, image, ASE, etc.)?
  • Do you need preview context (UI mockups, layout previews)?

Choose a generator that fits your typical design flow—whether quick mockups or fine-tuned branding work.

5. Applying Best Color Palette Generator to Fonts & Branding

Once you have a palette, here’s how to apply it in your font business:

  • Mockup backgrounds: Use primary or secondary palette colors behind your font samples.
  • Accent layers: Use secondary or highlight palette colors on swashes, alternates, curves, ligatures.
  • Font pairing visuals: Use different colors in your palette for heading, subheading, body text in your examples.
  • Hover / UI states: If you display font previews in a UI or webpage, use accent palette colors for hover overlay or border.
  • Brand consistency: Match your brand’s color vocabulary in your marketing, packaging, and interface visuals.

Your palette becomes an extension of brand identity, guiding how fonts are perceived in context.

6. Font Mockup Examples from Your Collection

Here are fonts from your catalog and mockup ideas using generated palettes:

  • Holdsmith — place it on a muted, complementary palette background; use a contrasting accent color for decorative strokes or shadows.
  • Ameralda Font — present in elegant tones with gentle accent hues to make the script pop.
  • Shailendra Font — use bold accent for the name, background in subdued palette tones to let details shine.
  • Leathering Font — try textured mockups with color palette-derived earthy tones + one bright accent to highlight edges or texture.

Test multiple generated palettes on the same font mockup to see which palette gives the desired mood or style.

Best Color Palette Generator

7. Tips & Best Practices When Working with Best Color Palette Generator

  • Don’t accept palette blindly—adjust saturation, brightness, contrast as needed.
  • Use the 60-30-10 rule: dominant, secondary, and accent colors proportions.
  • Always check text contrast – ensure legibility.
  • Combine with neutral grays or whites to buffer strong colors.
  • Lock colors you like and regenerate the rest to find variations.
  • Save your favorite palettes in a swatch library.
  • Use palette previews (UI, layout, mockups) before committing.
  • Test across devices/screens to avoid color surprises.

8. Common Pitfalls to Avoid

  • Accepting a palette without testing it in real use (mockups).
  • Ignoring contrast and readability.
  • Relying entirely on bright colors or extremes—balance with neutrals.
  • Using too many accent colors from generated palettes.
  • Forgetting to match your font style / brand tone with the palette mood.

9. Conclusion & Action Steps Best Color Palette Generator

A best color palette generator is not just a tool — it’s a creative partner that helps you explore harmony, contrast, and visual identity. For your font business, using strong, intentional palettes makes your typefaces look more professional, compelling, and cohesive in context.

Action Steps:

  1. Pick 2–3 generator tools above (e.g. Coolors, Adobe Color, Colormind).
  2. Generate 5–10 palettes and apply to one of your fonts in mockup visuals.
  3. Choose the palette(s) that reflect your brand mood, test readability.
  4. Save hex codes and build a swatch library.
  5. Use your palette consistently across branding, marketing, mockups.

References

  • Paletton — “The Color Scheme Designer”
  • Color Designer — “Color Palette Builder & Mixer”
  • Wixel — “8 Best Free Color Palette Generator Tools”
  • School of Motion — “10 Tools to Help You Design a Color Palette”

Posted on

New Best Online Logo Animation Software for Creative Brands

Online Logo Animation Software

Table of Contents

  1. Introduction: Why Logo Animation Matters
  2. Benefits of Using Online Logo Animation Software
  3. Top Online Logo Animation Tools in 2025
    • 3.1 Renderforest
    • 3.2 Animaker
    • 3.3 Canva Pro
    • 3.4 Motionden
    • 3.5 Adobe Express
  4. How to Choose the Right Logo Animation Software
  5. Tips for Creating a Stunning Animated Logo
  6. Enhance Your Animated Logo with Premium Fonts
  7. Conclusion
  8. References

1. Introduction: Why Logo Animation Matters

In today’s fast-paced digital world, Online Logo Animation Software is no longer just an option — it’s a powerful way to tell your brand story. A static logo can represent your identity, but an animated one brings it to life. Motion attracts attention, engages users, and leaves a lasting impression.

From YouTube intros to TikTok ads, animated logos have become a visual signature of modern branding. Thankfully, you don’t need to be a professional animator to create one. With the rise of online logo animation software, anyone can design a professional logo animation in minutes.

2. Benefits of Using Online Logo Animation Software

Using cloud-based tools to animate your logo offers several advantages:

  • Ease of use: Most platforms are drag-and-drop based with ready-to-use templates.
  • Cost-effective: No need for expensive software like After Effects.
  • Cloud storage: Access your projects anytime, anywhere.
  • Time-saving: Create high-quality animations in minutes.
  • Customization: Control motion speed, colors, typography, and more.

Whether you’re a small business owner or a professional designer, these platforms help you stand out in a visually crowded space.

Online Logo Animation Software

3. Top Online Logo Animation Tools in 2025

3.1 Renderforest

Renderforest is one of the most popular logo animation makers online. It offers hundreds of customizable templates with cinematic effects. You can easily upload your logo, select a style, and render your animation in HD.

3.2 Animaker

Animaker is a favorite among digital marketers. It’s designed for people with no animation experience but delivers professional-quality output. The platform supports both 2D and 3D logo animation and includes brand kits for consistency.

3.3 Canva Pro

Canva Pro isn’t just for social media graphics — it also offers animated logo templates with smooth transitions and effects. The drag-and-drop editor makes it easy to combine motion, sound, and text.


3.4 Motionden

Motionden specializes in creating video intros and animated logos. It features a large collection of modern, dynamic templates. You can export your project directly to YouTube or social platforms.


3.5 Adobe Express

From the creators of Photoshop and Illustrator, Adobe Express provides a sleek interface and professional templates for animated logos. It’s ideal for users who want Adobe’s quality but with less complexity.

4. How to Choose the Right Logo Animation Software

When selecting your animation tool, consider the following factors:

  • Ease of Use: A user-friendly interface helps you create faster.
  • Template Variety: Choose platforms with flexible and modern templates.
  • Export Options: Look for HD or 4K export capabilities.
  • Brand Integration: Check if the software supports your brand’s font and color palette.
  • Price and Subscription: Ensure the plan fits your budget and long-term needs.

5. Tips for Creating a Stunning Animated Online Logo Animation Software

Here are some expert tips to make your logo animation unforgettable:

  • Keep it short: Aim for 3–5 seconds of animation.
  • Focus on storytelling: Show motion that reflects your brand’s personality.
  • Match sound effects: Sync motion with subtle audio cues.
  • Use brand fonts: Consistency strengthens recognition.
  • Test across devices: Ensure it looks good on both desktop and mobile.
Online Logo Animation Software

6. Enhance Your Animated Online Logo Animation Software with Premium Fonts

Typography plays a major role in how your logo feels. Choosing a font that complements your animation can transform a simple logo into a memorable one.

Here are a few font recommendations from our collection to help your logo animation shine:

  • Cyranie Zalie Font — Elegant and modern, perfect for luxury or fashion brands.
  • Holters Font — A bold display font ideal for tech or gaming animations.
  • Workday Font — Clean and versatile, great for minimalist animated logos.

Combining smooth motion with expressive typography creates a truly dynamic visual identity.

7. Conclusion Online Logo Animation Software

Animated logos are more than just moving graphics — they’re a statement. By using the right online logo animation software, you can give your brand a unique edge that captures attention and builds recognition.

Whether you’re just starting out or refining your brand visuals, experimenting with animation and premium fonts can elevate your creative game. With tools like Canva Pro, Renderforest, and Adobe Express, creating professional animations has never been easier.

8. References

To ensure this article’s accuracy and depth, here are some reliable sources used for research:

Posted on

Boost New Creativity in 2025 with Adobe Illustrator Productivity Plugins

Adobe Illustrator Productivity Plugins

Table of Contents

  1. Introduction
  2. Why Productivity Plugins Matter for Font Designers
  3. Top Illustrator Plugins to Boost Workflow
    • 3.1 Astute Graphics Suite (VectorScribe, VectorFirstAid, etc.)
    • 3.2 Fontself Maker
    • 3.3 Select Menu
    • 3.4 SymmetryWorks
    • 3.5 Magic Exporter & Other Export Helpers
    • 3.6 Bonus: Cleanup / Nudge / Concatenate / ToolShed
  4. How to Use These Plugins in Font Mockups
  5. Tips for Choosing & Managing Plugins
  6. Case Study: Mockups with CalligraphyFonts
  7. Conclusion & Call to Action
  8. References

1. Introduction

In the world of vector design and type design, time is precious. Every minute saved on repetitive or tedious tasks can be reinvested into creativity, refinement, or exploring new ideas. That’s where Adobe Illustrator Productivity Plugins shine.

For font designers, these Adobe Illustrator Productivity Plugins aren’t just nice-to-have—they can streamline glyph cleanup, path editing, batch exports, symmetry generation, and more. In this article, we’ll explore the best productivity plugins for Illustrator, how they help in a font-oriented workflow, and how you can integrate them into your mockups and design process.

2. Why Productivity Plugins Matter for Font Designers

Even though Illustrator is powerful by itself, certain tasks remain friction points—like cleaning up messy vector artwork, splitting paths, aligning anchors, exporting multiple formats, or generating symmetric ornamentation. Plugins extend Illustrator’s native capabilities, allowing you to:

  • Automate repetitive tasks
  • Increase precision in path manipulation
  • Speed up export workflows (especially for marketing / font previews)
  • Add specialty tools not built into Illustrator
  • Reduce manual errors

Din Studio’s article on essential Illustrator plugins highlights how these extensions “improve productivity by providing significantly more efficient tools for some common tasks.”
Also, Ziflow’s list of “19 best Illustrator plugins” includes many productivity and collaboration tools that embed directly into the Illustrator workflow.

Adobe Illustrator Productivity Plugins

3. Top Adobe Illustrator Productivity Plugins to Boost Workflow

Berikut beberapa plugin unggulan yang sering disebut dalam ulasan desain sebagai pengubah produktivitas:

3.1 Astute Graphics Suite (VectorScribe, VectorFirstAid, etc.)

Astute Graphics adalah salah satu pemain besar dalam plugin Illustrator.
Beberapa modul penting:

  • VectorScribe: Smart removal of unnecessary points, dynamic corner tools, path extension, precise measurements.
  • VectorFirstAid: Membersihkan vektor (fix stray anchors, broken paths, text to outlines) yang sering muncul ketika impor desain kompleks.
  • Phantasm: Mengatur warna, efek vektor seperti halftone dan koreksi warna langsung dalam Illustrator.
  • ColliderScribe, ToolShed, Cleanup Tools, Concatenate, Nudge Panel: Beragam utilitas kecil tapi sangat menghemat waktu.

Banyak desainer menyatakan bahwa Astute plugins “shaved time off my workflow and opened new geometric doors.”
Di komunitas Adobe, plugin seperti VectorScribe, InkScribe, dan Reform disebut sebagai “sangat membantu dalam pengeditan path & spline.”

3.2 Fontself Maker

Fontself Maker memungkinkan kamu membuat font (OTF / SVG) langsung dari bentuk vector / lettering di Illustrator.
Fitur utamanya:

  • Drag & drop bentuk glyph
  • Ligatures & alternates
  • Font dengan warna (OpenType-SVG)

Bagi pembuat font, ini menghilangkan kebutuhan berpindah aplikasi (Illustrator → Font software).

3.3 Select Menu

Select Menu memperluas menu Select > Object dengan 18 fungsi tambahan — seperti memilih closed paths, open paths, compound paths, dll.
Plugin ini sederhana, gratis, dan sangat membantu ketika bekerja dengan dokumen kompleks yang berisi ribuan objek.

3.4 SymmetryWorks

Plugin ini membantu membuat pola simetris (mirror, repeat) secara otomatis. Di artikel Din Studio, disebut sebagai plugin yang cocok untuk wallpaper atau desain repeating pattern.
Sangat berguna untuk membuat dekorasi, borders, motif hias dalam tampilan font mockup.

3.5 Magic Exporter & Other Export Helpers

Plugin seperti Magic Exporter memungkinkan kamu memilih objek atau layer tertentu lalu langsung diekspor ke beberapa format (PNG, SVG) dengan otomatis.
Plugin semacam ini sangat berguna ketika kamu memiliki mockups font dalam berbagai variasi ukuran dan format.

3.6 Bonus: Cleanup / Nudge / Concatenate / ToolShed

Plugin-plugin utilitas kecil sering terlupakan tapi sangat berguna:

  • Concatenate: Gabungkan path terpisah secara otomatis jika endpoints dekat.
  • Cleanup Tools: Memperbaiki segment, menyederhanakan anchor, menjaga transisi halus.
  • Nudge Panel: Menggeser objek, dash, pattern fills dengan kontrol lebih halus.
  • ToolShed: Koleksi utilitas seperti offset open paths, duplicate removal, note panel, dan lainnya.

Bersama plugin-plugin utama di atas, kamu bisa sangat mengurangi kerja manual.

4. How to Use These Adobe Illustrator Productivity Plugins in Font Mockups

Untuk font designers, penggunaan plugin bukan hanya di fase perancangan glyph, tetapi juga dalam membuat mockup visual. Berikut beberapa contoh pemakaian:

  • SymmetryWorks → buat border dekoratif ulang tanpa menggambar manual
  • VectorScribe / Cleanup → setelah impor vektor motif atau background, bersihkan path agar lebih ringan
  • Magic Exporter → ekspor mockup font dalam berbagai ukuran (web preview, social media, pp) sekaligus
  • Select Menu → pilih objek tertentu (mis. hanya strokes tanpa fills) untuk di-layering
  • Fontself → jika kamu juga ingin menyajikan font test langsung sebagai glyph dalam mockup

Kamu bisa mencoba memadukan contoh font dari katalogmu:

Dengan plugin di atas, kamu bisa membuat mockup font dalam latar tematik Halloween, vintage, modern, atau motif custom dengan lebih efisien.

Adobe Illustrator Productivity Plugins

5. Tips for Choosing & Managing Adobe Illustrator Productivity Plugins

  • Mulai dari kebutuhan nyata: Identifikasi bagian mana dari workflow yang paling memakan waktu, lalu cari plugin untuk itu.
  • Kompatibilitas & pembaruan: Pastikan plugin kompatibel dengan versi Illustrator kamu. Plugin dari Astute Graphics misalnya rutin update.
  • Gunakan trial dulu: Banyak plugin premium menawarkan uji coba. Coba dulu sebelum beli.
  • Jangan terlalu banyak: Plugin berlebihan bisa membebani memori atau memperlambat startup Illustrator.
  • Organisasi & backup: Simpan plugin eksternal di folder khusus dan backup pengaturan / preset agar tidak hilang saat reinstall.
  • Pantau performa: Jika file jadi lambat, disable plugin tertentu untuk melihat pengaruhnya.

6. Case Study: Mockups with Adobe Illustrator Productivity Plugins CalligraphyFonts

Misalnya kamu ingin membuat mockup font Annandale untuk kampanye Halloween:

  1. Gunakan SymmetryWorks untuk membuat border ornament horor yang berulang.
  2. Impor motif vector eksternal, lalu jalankan VectorFirstAid / Cleanup agar path rapi.
  3. Atur komposisi, lalu ekspor menggunakan Magic Exporter dalam format PNG & SVG sekaligus.
  4. Bila kamu ingin sertakan preview glyph, gunakan Fontself Maker untuk mengubah contoh huruf langsung menjadi font (uji coba).
  5. Gunakan Select Menu untuk memilih elemen dekoratif tertentu dan memodifikasinya secara cepat dalam mockup.

Dengan alur ini, kamu hemat waktu dan hasil mockup tampil profesional serta konsisten.

7. Conclusion & Call to Action Adobe Illustrator Productivity Plugins

Adobe Illustrator Productivity Plugins bukan hanya alat tambahan — mereka menjadi bagian vital dari workflow desain modern, khususnya bagi pembuat font dan mockup visual. Dengan plugin-plugin seperti Astute Graphics suite, Fontself Maker, Select Menu, SymmetryWorks, dan alat ekspor produktif, kamu bisa mempercepat proses, menjaga kualitas, dan menghasilkan mockup yang menarik lebih cepat.

Kalau kamu tertarik, cobalah dulu satu atau dua plugin dalam daftar di atas, lihat seberapa banyak waktu yang bisa kamu hemat. Lalu, langkah berikutnya: integrasikan ke dalam template mockup fontmu, dan pantau konversi dari visual yang lebih halus.

Call to Action: Kalau kamu ingin saya bantu susun template mockup khusus plugin + tema (misalnya Halloween, luxury, vintage) untuk katalog fontmu, tinggal bilang ya — saya siap bantu!

References

  1. Din Studio — “7 Essential Adobe Illustrator Plugins Every Designer Needs”
  2. Ziflow — “19 best Adobe Illustrator plugins for designers and agencies”
  3. 99designs — “5 Best Productivity Plugins for Adobe Illustrator”
  4. Astute Graphics official site — “Astute Graphics plugin suite”
Posted on

Unlock Canva Pro: The Guide to Smarter, Faster Design

Canva Pro Pricing Upgrade

Table of Contents

  1. Introduction
  2. Canva’s Pricing Structure in 2025
  3. Key Features You Get with Canva Pro
  4. Free vs Pro: What You Gain
  5. Why Upgrade? Return on Creative Investment
  6. How Canva Pro Supports Font & Design Entrepreneurs
  7. Showcase Fonts using Canva Pro + Mockups
  8. Final Verdict
  9. References

1. Introduction

If you’re designing, branding, or selling fonts (like us), you may wonder whether upgrading to Canva Pro Pricing Upgrade is a worthwhile decision. The phrase “Canva Pro pricing upgrade” captures this exact dilemma for many creatives. With Canva becoming more feature-rich and AI-driven, the question isn’t simply “Can I afford Pro?” but rather “Will Pro help me scale, save time, or increase revenue?”

In this article, we break down what you actually get with Canva Pro, compare it against the free plan, and argue when the upgrade makes sense—especially for font creators, designers, and small creative businesses.

Canva Pro Pricing Upgrade

2. Canva’s Pricing Structure in 2025

Let’s begin with the numbers. According to Canva’s official pricing page, Canva offers multiple tiers including Free, Pro, Teams, and Enterprise.

External sources confirm that Canva Pro is priced around USD 12.99/month or USD 119.99/year (varies by region).
Moreover, Canva now heavily leans into AI enhancements and generative tools (Magic Studio, etc.), which feed into justification for pricing, especially for business/teams users.

Note: Canva sometimes adjusts regional pricing, and recently its Teams plan faced steep increases owing to AI feature rollouts.

3. Key Features You Get with Canva Pro

Upgrading unlocks a suite of advanced features not present (or only limited) in the free plan. Some of the most compelling ones:

  • Access to Premium Content Library — Over 100 million photos, illustrations, videos, audio assets included without extra cost.
  • Brand Kit & Font Uploads — You can define brand colors, logos, and upload your custom fonts to maintain consistency.
  • Background Remover Tool — One-click or automatic background removal for images, useful for product mockups.
  • Magic Resize / Reformatting Tools — Instantly adapt a design to different dimensions (Instagram, stories, posters).
  • Advanced Export Options — Export in SVG, transparent PNG, animated GIF/MP4 (depending on design).
  • Larger Storage & Folders — Instead of 5 GB (free), you often get 1 TB in Pro.
  • Generative AI Tools — Higher usage quotas of Magic Write, image generation, text-to-image, etc.
  • Better Collaboration & Workflow Features — Shared projects, version history, approval workflows (especially useful if you work in a small agency or team).
  • License Simplicity — Pro users automatically receive “Pro content license” so you don’t have to separately buy usage rights for many design assets.

Together, these features give Pro users a much more capable design workflow.

4. Free vs Pro: What You Gain

Here’s a side-by-side snapshot:

FeatureCanva FreeCanva Pro
Storage~5 GB Unlimited Graphic Design ~1 TB
Templates & AssetsLimited free templates + free elements Premium + full access to 100M+ assets
Brand Kit / FontsBasic color palette, limited branding toolsFull Brand Kit, font uploads, multiple brand kits
Background RemovalNot built in (or very limited)
Unlimited Graphic Design
Full background remover included
Resize / ReformatManual resizing onlyMagic Resize / automatic reformatting Unlimited Graphic Design
Export FormatsPNG, JPG, PDF (basic) SVG, transparent PNG, animation exports
AI & Generative ToolsLimited usageExpanded credits, full access
Collaboration / WorkflowBasic sharing and commentingAdvanced sharing, approval flows, team tools Unlimited Graphic Design

From a functional perspective, the gap is quite wide — for casual users, Free may suffice. But for professionals, Pro offers a productivity boost.

5. Why Upgrade? Return on Creative Investment

When considering a Canva Pro Pricing Upgrade, you want to see returns in either time saved, higher quality output, or increased revenues / sales.

  • Time Efficiency: Tools like Magic Resize, background remover, and template reuse dramatically reduce hours per design.
  • Consistency & Branding: With brand kits and custom font uploading, every design stays on brand, which is essential for brand identity.
  • Better Assets: Access to premium stock, illustrations, and design elements means fewer external purchases or workarounds.
  • Scalability: As your font business or design studio grows, collaboration, workflows, and team features become critical.
  • AI Leverage: Generative tools can speed ideation, mockups, or variations, giving you more creative options in less time.
  • License simplicity: With Pro content licensing, you reduce friction in using assets legally for commercial purposes.
Canva Pro Pricing Upgrade

If a single client project pays more than your monthly Pro cost—or if you reclaim hours weekly—the upgrade can pay for itself many times over.

6. How Canva Pro Pricing Upgrade Supports Font & Design Entrepreneurs

Because your business is centered on fonts and design, here’s how Canva Pro specifically helps:

  • Custom Font Previews & Mockups: Upload your fonts to create direct previews, sample text graphics, and promotional banners.
  • Product Marketing Assets: Use Pro templates + premium assets to create polished flyers, social media ads, and web banners.
  • Better Visual Consistency: Store your brand palette and logos, then apply them across all designs quickly.
  • Faster Iterations: You can generate multiple versions of one design quickly (e.g. size, colors, text) using AI or tools like Magic Resize.
  • Collaboration with Clients: Share editable previews with clients, allow comments, or receive feedback directly in Canva.
  • Mockup Realism: Remove backgrounds, place your fonts on product images or lifestyle photos seamlessly.
  • Reduced Asset Costs: Save on purchasing stock or graphic assets externally since many are bundled.

When selling fonts, first impressions matter.Canva Pro Pricing Upgrade helps you present your typefaces in compelling, high-quality contexts effortlessly.

7. Showcase Fonts using Canva Pro Pricing Upgrade + Mockups

Here are three font examples you can use in your Canva Pro Pricing Upgrade designs or promotional mockups (linking to your products as examples):

Using Canva Pro’s features, you can:

  • Upload each font and build brand templates around them
  • Use background remover + stock photography to mock them in real-world scenes
  • Generate social media banner sets with unique font treatments
  • Use generative AI or mockup tools to present fonts in varied contexts (e.g. packaging, greeting cards, logos)

These mockups, when done well, help potential customers visualize the font in use, increasing sales confidence.

8. Final Verdict Canva Pro Pricing Upgrade

The Canva Pro Pricing Upgrade is not just about paying for extra “nice-to-have” features. For serious creatives, using fonts commercially, or running design ventures, it’s a productivity multiplier and brand automator.

If your design workflows are frequent, your clients demand polish, or your font business needs a strong visual identity, Pro is a strategic investment. For occasional or hobby use, the free plan can still do the basics.

In short: Upgrade when it helps you deliver better results faster, not merely because of added features.

9. References

  1. Canva – Pricing & Plans (official)
  2. Canva — Pro Features (official)
  3. Spendflo — Canva Pricing Guide (2025)
  4. Penji — Canva Free vs Paid (feature comparison)
Posted on

How a New Canva Pro Upgrade Can Instantly Boost Your workflow

Canva Pro Upgrade

Table of Contents

  1. Introduction: Why a Canva Pro Upgrade Is Worth Considering
  2. Canva Free vs Canva Pro: What’s the Real Difference?
  3. Key Features That Make the Canva Pro Upgrade a Game-Changer
  4. Why the Canva Pro Upgrade Benefits Designers and Businesses
  5. Pricing and Free Trial Options for Canva Pro
  6. When Is the Right Time to Upgrade to Canva Pro?
  7. Enhance Your Canva Designs with Premium Fonts
  8. Final Thoughts: Is the Canva Pro Upgrade Right for You?

1. Introduction: Why a Canva Pro Upgrade Is Worth Considering

If you’ve ever wondered whether a Canva Pro upgrade is really worth it, you’re not alone. Millions of designers, marketers, and small business owners use Canva every day — but only a fraction take advantage of the advanced tools hidden behind the Pro plan.

The Canva Pro upgrade gives you more than premium templates; it’s a complete creative ecosystem that helps you save time, boost productivity, and deliver professional-grade designs. From AI-assisted tools to brand management features, Canva Pro transforms your design workflow and empowers you to create content that stands out in any market.

Canva Pro Upgrade

2. Canva Free vs Canva Pro: What’s the Real Difference?

At first glance, the free version of Canva offers plenty — templates, fonts, and drag-and-drop simplicity. However, once you start designing regularly, you’ll notice the limitations.

Here’s what you get with the Canva Pro upgrade:

  • Access to over 100 million premium photos, videos, and graphics
  • The Background Remover tool for cleaner visuals
  • Magic Resize, which instantly adapts designs for multiple platforms
  • The Brand Kit, keeping your logo, colors, and fonts consistent
  • Cloud storage up to 1TB, ideal for design agencies and teams

These upgrades aren’t just for convenience — they enable you to work smarter, not harder.

3. Key Features That Make the Canva Pro Upgrade a Game-Changer

The Canva Pro upgrade unlocks a suite of professional features that elevate your creative potential:

Brand Consistency with Brand Kit

Maintain design cohesion across projects by saving brand colors, logos, and fonts.

Magic Resize for Instant Adaptability

Convert a single post into perfectly sized versions for Instagram, Pinterest, and YouTube with one click.

AI-Powered Tools

Use tools like Magic Write and AI Text to Image to generate content ideas or create custom visuals effortlessly.

Collaborative Workspaces

Invite team members, share folders, and edit designs together in real time — ideal for creative agencies.

4. Why the Canva Pro Benefits Designers and Businesses

The Canva Pro upgrade is not just for solo creators — it’s designed to scale with your business.
For freelancers, it provides professional polish and the ability to deliver faster. For design agencies, it simplifies workflow management and brand alignment across multiple clients.

More importantly, the Canva Pro tools help businesses maintain a cohesive visual identity, which boosts brand recognition and trust — key elements of successful marketing.

Canva Pro Upgrade

5. Pricing and Free Trial Options for Canva Pro

The Canva Pro upgrade offers flexibility for both individuals and teams:

  • Monthly plan: $14.99/month
  • Yearly plan: $119.99/year (save over 20%)

You can also start with a free 30-day trial to explore its features before committing.

6. When Is the Right Time to Upgrade to Canva Pro Upgrade?

Consider upgrading when:

  • You create designs daily or weekly
  • You need brand consistency across clients or social platforms
  • You’re tired of downloading stock photos separately
  • You need faster turnaround for professional work

The Canva Pro upgrade becomes invaluable once you start managing multiple design projects or clients — saving both time and cost.

7. Enhance Your Canva Pro Upgrade Designs with Premium Fonts

Even with all of Canva Pro’s tools, fonts still play a crucial role in defining your brand identity.
Upgrade your visuals with these stunning premium fonts from Calligraphy Fonts that pair perfectly with your Canva Pro projects:

8. Final Thoughts: Is the Canva Pro Upgrade Right for You?

The Canva Pro upgrade is more than just a premium design tool — it’s a creative investment. With access to professional assets, AI design assistants, and collaboration tools, it helps you design faster, stay consistent, and scale your creative workflow effortlessly.

Whether you’re an individual creator or part of a design agency, the Canva Pro upgrade gives you the freedom to design without limits — and that’s worth every penny.

References

  1. Canva Pro Official – Features & Pricing
  2. HubSpot – How to Use Canva Like a Pro
  3. TechRadar – Canva Review 2024
Posted on

Professional Graphic Design Apps: Tools Every Designer Should Know

Professional Graphic Design Apps

Table of Contents

  1. Introduction
  2. What Makes a Graphic Design App “Professional”?
  3. Top Professional Graphic Design Apps in 2025
     3.1 Adobe Creative Cloud (Illustrator, Photoshop, InDesign)
     3.2 Affinity Designer & Affinity Suite
     3.3 Figma (UI / Collaboration focus)
     3.4 CorelDRAW Graphics Suite
     3.5 Procreate & Fresco (for digital drawing / illustration)
  4. How to Choose the Right App for Your Workflow
  5. Use Cases: Fonts, Mockups & Branding Assets
  6. Tips & Best Practices for Using Graphic Design Apps
  7. Conclusion
  8. References

1. Introduction Professional Graphic Design Apps

In the fast-evolving world of design, choosing the right professional graphic design apps can make or break your workflow. Whether you’re crafting logos, layouts, illustrations, or brand assets, the tools you use influence speed, quality, flexibility, and collaboration.

In this article, we’ll explore what defines a “professional” graphic design app, review top apps designers use today, show how they apply to font design & mockups, and offer tips to level up your design process.

2. What Makes a Professional Graphic Design Apps?

Not every app with “design” in its name qualifies as professional for serious work. Here are key criteria:

  • Precision & vector support for scalable graphics.
  • Robust toolsets (pen tools, layers, masking, color controls, typography).
  • File compatibility & export options (PDF, SVG, EPS, high-res raster).
  • Performance & stability on real world projects.
  • Collaboration & version control features (for teams).
  • Plugin / ecosystem support for extended workflows.
  • Cross-platform availability or compatibility (Windows, Mac, iPad, web).

Apps that meet these demands tend to appear in “best graphic design software” roundups such as TechRadar’s lists of 2025 graphic design tools.

Professional Graphic Design Apps

3. Top Professional Professional Graphic Design Apps in 2025

Below are several widely used and respected graphic design applications, each with distinct strengths. Use a mix depending on your design needs.

3.1 Adobe Creative Cloud (Illustrator, Photoshop, InDesign)

Adobe remains the standard in professional design. Illustrator excels at vector graphics, logos, typography. Photoshop handles raster editing, photo manipulation, and complex compositions. InDesign is for layout, print, magazines, and multi-page documents. Adobe markets these as “industry-leading graphic design apps.”

Pros: broad feature set, rich plugin ecosystem, compatibility, support.
Cons: subscription cost, learning curve.

3.2 Affinity Designer & Affinity Suite

Affinity Designer (vector + raster tools combined) and Affinity Photo / Publisher offer strong, one-time purchase alternatives to Adobe. They’re praised in many design tool comparisons.

Pros: cost-effective, powerful features, friendly UI.
Cons: less ecosystem / plugin support compared to Adobe.

3.3 Figma (UI / Collaboration focus)

Figma has become a go-to especially in UI/UX and collaborative design workflows. Multiple users can work simultaneously, prototype, hand off designs. Reddit designers often cite Figma, Illustrator, Photoshop as core tools.

Pros: collaboration, prototyping, web-based.
Cons: less robust for print workflows or heavy illustration.

3.4 CorelDRAW Professional Graphic Design Apps Suite

CorelDRAW is popular especially in certain regions and for brand / signage design workflows. It remains part of many “best graphic design software” lists.

Pros: strong vector tools, layout, font management, print support.
Cons: lesser adoption in some markets, plugin ecosystem more limited.

3.5 Procreate & Fresco (for digital drawing / illustration)

For illustrators and designers who prefer drawing by hand, Procreate (iPad) and Adobe Fresco (desktop + iPad) are top apps. Recently, Adobe Fresco became free to attract more illustrators.

Pros: natural brush engine, expressive illustration capabilities.
Cons: less suited for layout or multi-page documents.

4. How to Choose the Right App for Your Workflow

Selecting the right tool depends on:

  • Primary work type: branding, print, UI, illustration, web.
  • Team vs solo: need collaboration, cloud tools, versioning.
  • Budget & licensing model: subscription vs perpetual.
  • Learning curve & support: available tutorials, community.
  • Compatibility / export needs: can it output formats your clients need?

For example, if most of your work involves creating font mockups, marketing assets, and brand deliverables across web and print, you might combine Illustrator or Affinity Designer with Procreate (for decorative elements), and Figma for collaboration.

Professional Graphic Design Apps

5. Use Cases: Fonts, Mockups & Branding Assets

As a font designer / seller, here’s how professional graphic design apps help you:

Your choice of app affects how well you can refine kerning, manage vector outlines, integrate textures, export high-res assets, and hand off layered files to clients.

6. Tips & Best Practices for Using Professional Graphic Design Apps

  • Organize assets & layers cleanly. Use naming, grouping, collapse unused layers.
  • Use artboards and symbols / components for repeating elements (logos, templates).
  • Work in vector as much as possible, raster only when needed.
  • Color and typography styles / libraries: keep consistency using shared libraries.
  • Use version control or backup often, especially when experimenting.
  • Test output across devices / mediums before finalizing.
  • Leverage community plugins or extensions to speed repetitive tasks.
  • Stay updated: apps evolve; new features may solve existing bottlenecks.

7. Conclusion

In 2025, the landscape of professional graphic design apps is rich and diverse. No single app fits every designer, but by understanding your workflow needs and combining apps smartly, you can maintain high efficiency, quality, and creative freedom.

For font designers and branding professionals, these apps become your canvas—creating mockups, integrating typography, exporting client deliverables, and building brand identities. The better your tools, the more your work can shine.

References

  • TechRadar Best graphic design software of 2025.
  • Bird.Marketing10+ Best Graphic Design Tools (Free & Paid).
  • Adobe Industry-leading graphic design apps.
  • Learn G2The 9 Best Free Graphic Design Tools.

Posted on

Breakthrough AI Tools for Designers 2025: Unleash Creativity with Confidence

AI design tools

    Table of Contents

    1. Introduction: Why AI Matters for Designers in 2025
    2. Key Benefits of AI Tools in Design
    3. Top AI Tools for Designers in 2025
      • Adobe Firefly
      • Canva AI Tools
      • Figma AI Plugins
      • Runway ML
      • MidJourney & DALL·E
    4. How AI Improves Workflow and Productivity
    5. Real-World Use Cases of AI in Design
    6. Fonts and Visual Identity: Keeping Creativity Human
    7. Challenges and Ethical Considerations
    8. Future Trends: Where AI and Design are Heading
    9. Recommended Fonts for Modern AI-Driven Projects
    10. References

    1. Introduction: Why AI Design Tools Matter in 2025

    AI design tools are reshaping the creative workflow in 2025. By automating repetitive tasks and suggesting bold creative directions, AI design tools let designers focus on strategy and craft—while speeding up production and experimentation. By 2025, AI tools for designers are expected to be indispensable for streamlining workflows, improving productivity, and unlocking creativity. According to Adobe, AI-powered tools help designers save time on repetitive tasks while still allowing full creative control.

    2. Key Benefits of AI Tools in Design

    Using AI tools provides:

    • Faster design iterations
    • Automated background removal, resizing, and image enhancement
    • Smart design recommendations
    • Enhanced collaboration with real-time suggestions

    As highlighted in HubSpot’s blog, AI empowers creatives to focus on storytelling and strategy instead of wasting time on manual edits.

    AI design tools

    3. Top AI Design Tools for Designers

    Adobe Firefly

    Adobe’s AI tool helps generate text-to-image, text effects, and 3D mockups, making it ideal for branding projects.

    Canva AI Tools

    Canva integrates AI for instant design generation, copywriting, and resizing across platforms.

    Figma AI Plugins

    AI-powered plugins in Figma automate wireframes, design systems, and UX suggestions.

    Runway ML

    Perfect for motion graphics, Runway ML allows video editing with text prompts.

    MidJourney & DALL·E

    Both tools specialize in AI image generation, helping designers brainstorm visual directions quickly.

    4. How to Choose the Right AI Design Tools

    A Forbes report confirms that designers adopting AI reduce project timelines by nearly 40%. This makes AI tools essential for freelancers and agencies handling multiple clients.

    5. Real-World Use Cases of AI in Design

    • Logo creation with AI-generated variations
    • Presentation slides optimized with AI layout tools
    • Social media visuals auto-adjusted for each platform
    • Font pairing recommendations for branding projects

    6. Fonts, Branding, and AI Design Tools

    Even with AI tools, fonts remain a human touch that defines brand personality. At CalligraphyFonts.net, we provide creative fonts that complement AI-driven design projects.

    Examples:

    AI design tools

    7. Challenges and Ethical Considerations

    While AI brings efficiency, designers must address:

    • Copyright concerns for AI-generated assets
    • Over-reliance on automation
    • Maintaining originality and creative authenticity

    As Smashing Magazine notes, the challenge is balancing automation with human creativity.

    8. Future Trends: Where AI and Design are Heading

    By 2030, AI is expected to evolve into personalized creative assistants that understand a designer’s unique style. This will help creatives stay competitive in branding, UX, and digital marketing.

    9. Recommended Fonts for Modern AI-Driven Projects

    • Technophile Font – futuristic visuals
    • Denham Font – bold brand statements
    • Neutrons Font – minimalist UX design
    • Gimme Rose Font – expressive artistic projects

    10. References

    1. Adobe – Creative Cloud Generative AI Features
    2. HubSpot – AI in Graphic Design: The Pros, Cons and What it Means for Designers
    3. Forbes – Why Graphic Designers Are Embracing AI
    4. Canva – AI Tools for Creative Design
    5. Smashing Magazine – AI Technology Will Transform Design